Parameterization is the soul of software testing (it also includes automation testing). We have discussed various techniques here (at inviul) to maintain the test data in our Automation Framework. Today we are going to discuss the uses of @Parameters annotation to inject test data from a testng.xml file. Though the scope of this technique is not broader than @DataProvider technique, still it keeps its significance to leverage parameterization in our automation framework. You can say, this is one of the most important features of TestNG, which you can’t observe in Junit.
In the previous tutorial, we have seen the implementation of @DataProvider annotation in the Selenium project which leverages parameterization in a very broader sense. Before we discuss the implementation of @Parameters annotation which helps in parameterization, let’s have a quick look at some of the techniques to implement parameterization in the Selenium project.
- How to parse JSON test data?
- Write data to the JSON file
- Read test data from the excel sheet using POI
- Write data to the excel sheet using POI
- Parameterization using @DataProvider annotation
- How to read properties file in Selenium?
Some of the exclusive TestNG tutorials are-
- How to install TestNG in Eclipse?
- What are different annotations in TestNG?
- How to ignore Tests in Selenium using TestNG?
- How to skip Tests in Selenium using TestNG?
I believe above tutorials will help you achieve parameterization through various techniques.
Now coming to the implementation of @Parameters annotation in your Selenium project. First of all, you need to create a TestNG class where you will write your test case inside @Test annotation. Test data will be used inside the Test case, so we define some variable name where the value of test data will be stored. We will use this variable where we want its value to be observed.
We will assign a value to this variable from testng.xml by using the following statement:
<parameter name=”name of the variable” value=”value of the variable” >
If you go for any interview, then interviewer generally ask questions related to @Parameters annotation and its uses. You can click below for quick Selenium interview questions.
Exclusively for You: Top 200 Selenium Interview Questions

If we have to implement @Parameters annotation in our project, then its implementation will be written below the @Test annotation. Let’s have a look inside the sample program which implement @Parameters annotation in Selenium project using TestNG.
Sample Program to implement @Parameters annotation
package Test;

import java.util.concurrent.TimeUnit;

import org.openqa.selenium.WebDriver;
import org.openqa.selenium.chrome.ChromeDriver;
import org.testng.annotations.Parameters;
import org.testng.annotations.Test;

public class ParametersAnnotationUses {


  @Test
  @Parameters("url")
  public void parametersAnnotationExample(String url) {

	  System.out.println("Value assigned from testng.xml is- "+url);

	  System.setProperty("webdriver.chrome.driver", "C:\\Selenium\\chromedriver.exe");

  	  WebDriver driver = new ChromeDriver();

  	  driver.manage().timeouts().implicitlyWait(10, TimeUnit.SECONDS);

  	  driver.get(url);

  	  driver.manage().window().maximize();

  	  driver.close();

	  driver.quit();
  }
}
Value assignment through the estng.xml file
Below is the assignment of value to the variable name annotated by @Parameters annotation through the estng.xml file.
<?xml version="1.0" encoding="UTF-8"?>
<!DOCTYPE suite SYSTEM "http://testng.org/testng-1.0.dtd">
<suite name="Suite">
  <test thread-count="5" name="Test">
  <parameter name="url" value="http://www.inviul.com/" >
    <classes>
      <class name="Test.ParametersAnnotationUses"/>
    </classes>
    </parameter>
  </test> <!-- Test -->
</suite> <!-- Suite -->
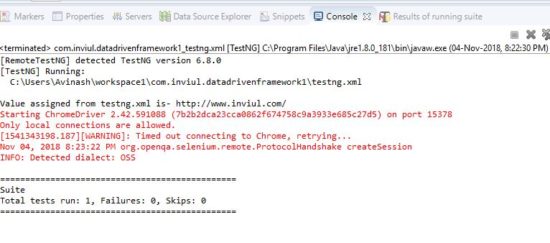
Console output

That’s all about @Parameters annotation. You can ask your doubts here and also you can join our Facebook group for more updates on Automation Testing using Selenium WebDriver.


