We have discussed the execution of Selenium tests from the command line in our previous tutorial. Now it’s time to know about image comparison testing, which is not so discussed topic because testers are more engaged in the validation of texts, buttons, forms, fields, etc. Sometimes images like Logo, infographics, photo blog and any other kind of graphics testing becomes mandatory for the business. So today we will look into the different aspects of Image comparison testing through automation using Selenium WebDriver and Java.
We will first discuss various possible scenarios that could occur while doing image testing then we will further take those scenarios through automation.
Why Image Comparison Testing?
In today’s era, organizations try to convey their messages through visual media, be it an image, graphics or videos. Therefore, it becomes mandatory for testers to not miss any scenarios which give better business to the clients.
What are the industries involved in Image/picture testing?
I don’t think any industries are left who are not involved in the minor or major level of image testing. At least, organizations will ask testers to perform testing of the logo placed on their business website. Still, I have listed some of the industries below where Image comparison testing can be extensively used.
Industries involved in picture testing are:
- E-Commerce industry
- Gaming industry
- Social media industry like photoblogs, Instagram, etc
- Content Marketing industry
- SEO industry

Image Testing Scenarios with their Selenium Implementation
Image testing would be new to many testers, so to give you ease, I have created some generic test scenarios which might help you in building the knowledge base for Image comparison testing.
Let’s start.
Scenario# 1: Logo Validation on the Business site
This is one of the most generic test scenarios and I am pretty sure every functional tester would be doing this. But here we will see logo validation through automation by using Selenium WebDriver and Java.
Here is the sample program.
package Test;

import java.util.concurrent.TimeUnit;

import org.openqa.selenium.By;
import org.openqa.selenium.WebDriver;
import org.openqa.selenium.WebElement;
import org.openqa.selenium.chrome.ChromeDriver;
import org.testng.Assert;
import org.testng.annotations.Test;

public class LogoPresent {
	WebDriver driver = null;

  @Test
  public void logoPresent() {

	  System.setProperty("webdriver.chrome.driver", "C:\\Selenium\\chromedriver.exe");
	  driver = new ChromeDriver();
	  driver.get("http://www.inviul.com");
	  driver.manage().timeouts().implicitlyWait(10, TimeUnit.SECONDS);
	  driver.manage().window().maximize();

	  //Get WebElement reference of logo
	  WebElement logo = driver.findElement(By.xpath("//h1[@id='logo']//a//img"));

	  Boolean logoPresent = logo.isDisplayed();

	  Assert.assertTrue(logoPresent, "Logo Presen");

	  driver.close();
	  driver.quit();


  }
}
Scenario# 2: Image Present or not
Sometimes we have to take care of the occurrences of a particular kind of image on the website. So, in such case, we have to validate whether that image is present there or not.
Let’s have a look at its implementation.
At first, we will take WebElement of the image and then we will create a Boolean form of the JavaScript. In the following sample program, we just verify whether the logo image is present on Inviul or not.
package Test;

import java.util.concurrent.TimeUnit;

import org.openqa.selenium.By;
import org.openqa.selenium.JavascriptExecutor;
import org.openqa.selenium.WebDriver;
import org.openqa.selenium.WebElement;
import org.openqa.selenium.chrome.ChromeDriver;
import org.testng.annotations.Test;

public class ImagePresent {
	WebDriver driver = null;

  @Test
  public void imagePresentProcess() throws InterruptedException {
	  System.setProperty("webdriver.chrome.driver", "C:\\Selenium\\chromedriver.exe");
	  driver = new ChromeDriver();
	  driver.get("http://www.inviul.com");
	  driver.manage().timeouts().implicitlyWait(10, TimeUnit.SECONDS);
	  driver.manage().window().maximize();

	  //Get WebElement reference of logo
	  WebElement logoElement = driver.findElement(By.xpath("//h1[@id='logo']//a//img"));

	  Thread.sleep(3000);

	  JavascriptExecutor js = ((JavascriptExecutor)driver);
	  Boolean imgPresent =  (Boolean) (js.executeScript("return arguments[0].complete && typeof arguments[0].naturalWidth != \"undefined\" && arguments[0].naturalWidth > 0", logoElement));

	  if(imgPresent==true){
		  System.out.println("Image is present");
	  }else{
		  System.out.println("Image is not present");
	  }

	  driver.close();
	  driver.quit();
  }
}
Scenario# 3: Image Comparison Testing between two images with Selenium WebDriver
This is the title of this blog post. Here we have to compare two images bit by bit through Selenium WebDriver and Java. We can easily perform Image comparison testing through look and feel, but it becomes typical to instruct computer through the program to compare two images.
Well, I am here to make you feel easy. 😊
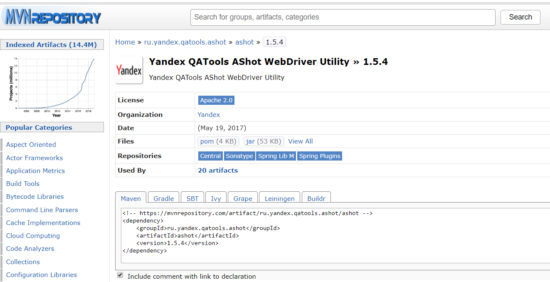
Here we need to add jar files of Yandex QA tool, which supports to take a screenshot of particular WebElement. Click here to download Yandex QATools AShot Utility. Alternatively, you can add maven dependency in pom.xml. You may click here to know more about Yandex QATools at GitHub.

See the following sample program which is guiding start to compare two images and make test result pass or fail based on the comparison.
package Test;

import java.awt.image.BufferedImage;
import java.io.File;
import java.io.IOException;
import java.util.concurrent.TimeUnit;

import javax.imageio.ImageIO;

import org.testng.Assert;
import org.openqa.selenium.By;
import org.openqa.selenium.WebDriver;
import org.openqa.selenium.WebElement;
import org.openqa.selenium.chrome.ChromeDriver;
import org.testng.annotations.Test;
import ru.yandex.qatools.ashot.AShot;
import ru.yandex.qatools.ashot.Screenshot;
import ru.yandex.qatools.ashot.comparison.ImageDiff;
import ru.yandex.qatools.ashot.comparison.ImageDiffer;

public class ImageComparison {

	WebDriver driver = null;

  @Test
  public void imageComparisonProcessing() throws IOException, InterruptedException {
	  System.setProperty("webdriver.chrome.driver", "C:\\Selenium\\chromedriver.exe");
	  driver = new ChromeDriver();
	  driver.get("http://www.inviul.com");
	  driver.manage().timeouts().implicitlyWait(10, TimeUnit.SECONDS);
	  driver.manage().window().maximize();

	  //Get WebElement reference of logo
	  WebElement logoElement = driver.findElement(By.xpath("//h1[@id='logo']//a//img"));

	  Thread.sleep(3000);

	  //Capture and store logo image
	  Screenshot shot = new AShot().takeScreenshot(driver, logoElement);
	  File file = new File(System.getProperty("user.dir")+"\\ImageFolder\\logo.png");
	  System.out.println(file);
	  ImageIO.write(shot.getImage(), "PNG", file);


	  //Getting Expected Image
	  BufferedImage expectedImg = ImageIO.read(file);

	  //Getting Actual Image
	  BufferedImage actualImg = shot.getImage();

	  //Image Comparison
	  ImageDiffer imgDiff = new ImageDiffer();
	  ImageDiff dif = imgDiff.makeDiff(expectedImg, actualImg);
	  if(dif.hasDiff()){
		  System.out.println("Both images are different");
	  }else {
		  System.out.println("Both images are same");
	  }

	  driver.close();
	  driver.quit();
  }
}
Scenario# 4: Pixel Comparison Testing with Selenium WebDriver
In this scenario, we perform image comparison testing pixel by pixel with Selenium WebDriver and Java. Pixel is like the atomic particle of an image, so a large number of pixels together combined to make an image. Here we will test the image by its pixels. Following code snippet used to perform pixel comparison testing of any image. Let’s have a look.
package Test;

import java.awt.Image;
import java.awt.Toolkit;
import java.awt.image.PixelGrabber;
import java.util.Arrays;

import org.testng.annotations.Test;

public class PixelComparisonTesting {

  @Test
  public void imageProcessing() {

	  //Declaration of files from local drive
	  String imgFile1 = "C:\\Users\\blogg\\Desktop\\Webdriver chromedriver.jpg";
	  String imgFile2 = "C:\\Users\\blogg\\Desktop\\inviul logo.jpg";

	  //Encoding image file
	  Image img1 = Toolkit.getDefaultToolkit().getImage(imgFile1);
	  Image img2 = Toolkit.getDefaultToolkit().getImage(imgFile2);

	  try{
		//Getting pixels
		  PixelGrabber pixGrab1 = new PixelGrabber(img1, 0, 0, -1, -1, false);
		  PixelGrabber pixGrab2 = new PixelGrabber(img2, 0, 0, -1, -1, false);

		  //Integer array to store the pixels
		  int[] dataArry1 = null;
		  int[] dataArry2 = null;

		  //Getting Height & Width of the pixels
		  if(pixGrab1.grabPixels()){
			  int height = pixGrab1.getHeight();
			  int width = pixGrab1.getWidth();
			  dataArry1 = new int[width * height];
			  dataArry1 = (int[])pixGrab1.getPixels();
		  }

		  if(pixGrab2.grabPixels()){
			  int height2 = pixGrab2.getHeight();
			  int width2 = pixGrab2.getWidth();
			  dataArry2 = new int[width2 * height2];
			  dataArry2 = (int[])pixGrab2.getPixels();
		  }

		  System.out.println("Pixel Comparison: "+Arrays.equals(dataArry1, dataArry2));

	  }catch(Exception e){
		  e.printStackTrace();
	  }


  }
}
This was all about Image Comparison Testing with Selenium WebDriver and Java. Inviul offers weekly Selenium Tutorials with an innovative post. You can post your queries in comment below.


